For interior designers
Last updated
An AI tool for interior designers to show clients concepts
AI Room Styler is an AI interior design tool for interior designers' concept work. Upload a client's room photo, or a SketchUp or Revit screen grab, and generate photorealistic directions across 46 styles to present side by side. Change one object without regenerating the rest, redo a result with the changes the client asks for, and upscale the chosen version for print.
Early concepting eats hours. Generate photorealistic style directions from a room photo in minutes, present several options to clients, and reserve your time for the work only you can do.
Try a restyle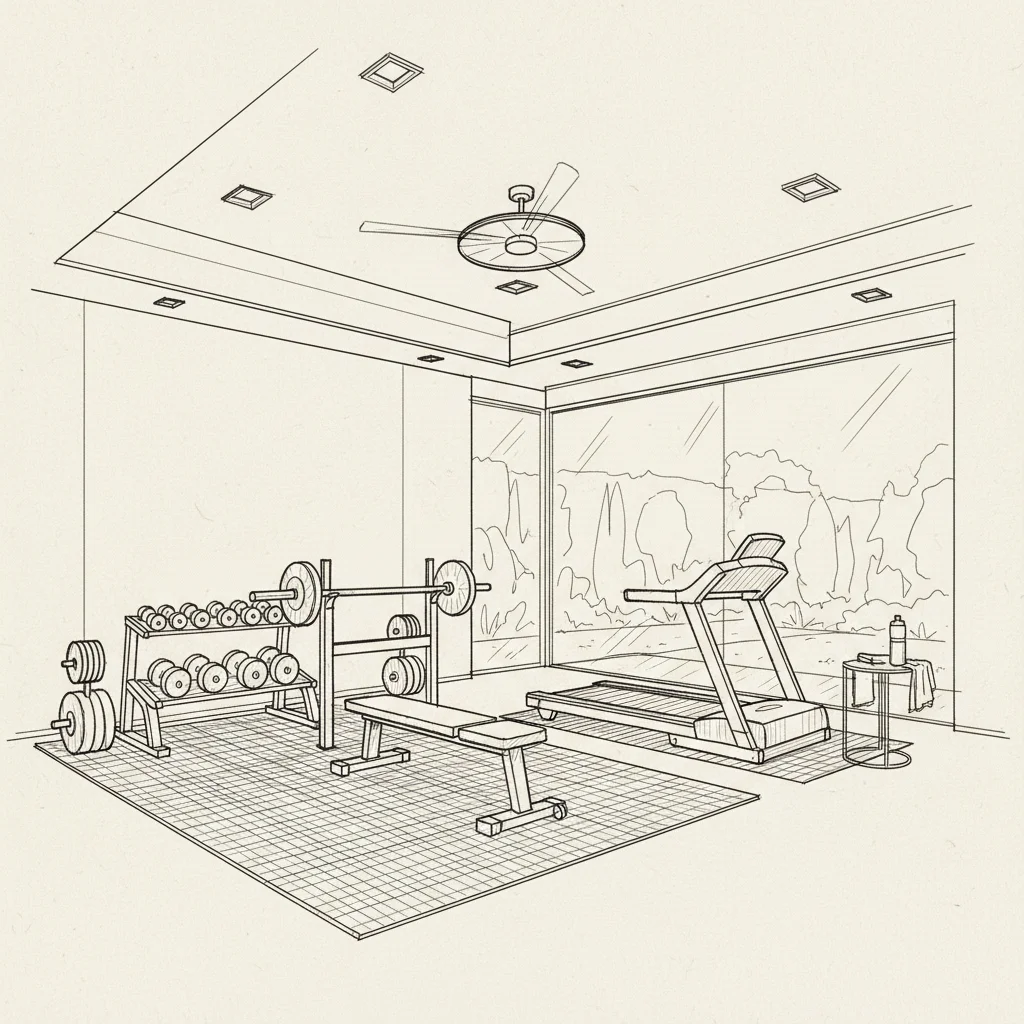 Before
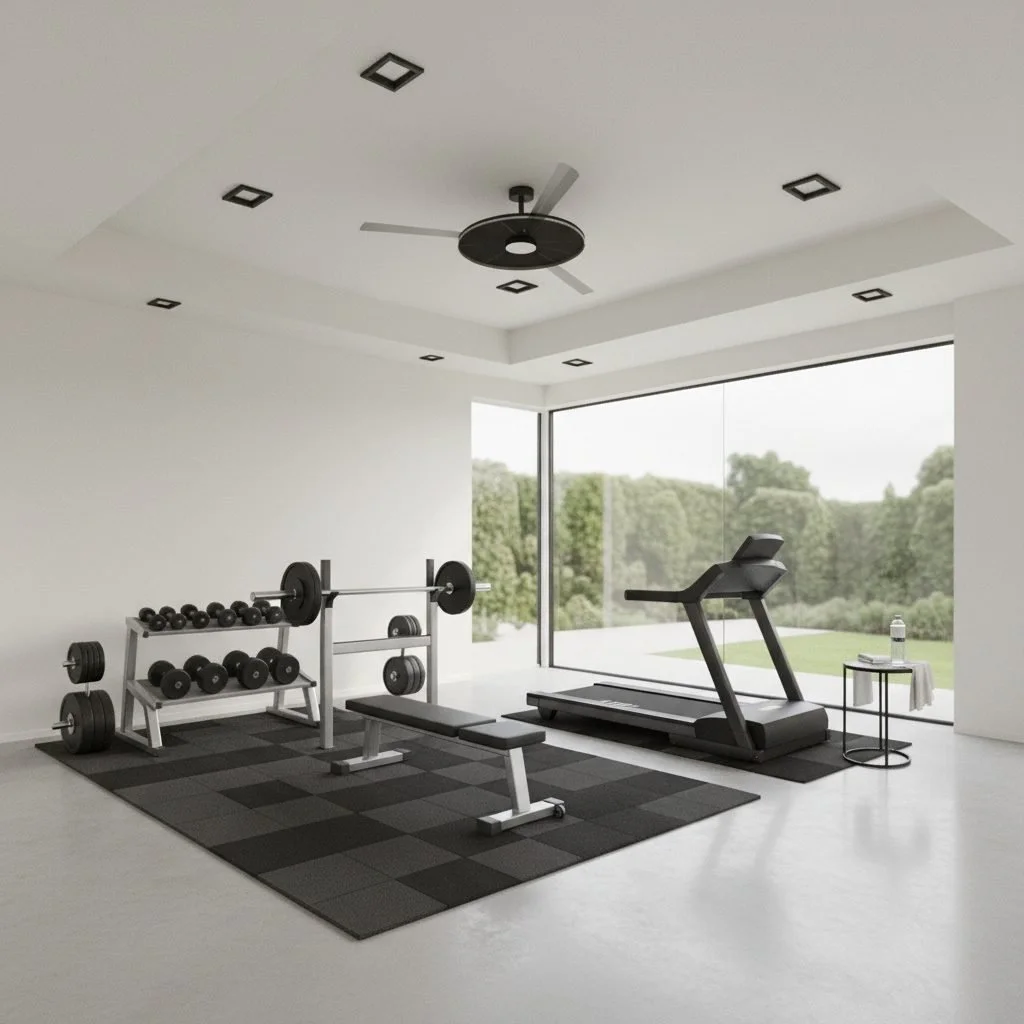 After
AfterMinutes
from room photo to concept options
Multiple styles
generated from the same photo
Your taste
sourcing and execution stay with you
The slowest part of a project is often the earliest: turning a brief and a room photo into concepts a client can react to. A mood board can show what a scheme is made of, but not what it does to the room in front of them, so the client is still guessing. Generating photorealistic directions from the actual room lets you walk into the first meeting with options on the screen, reach a decision faster, and spend your billable hours on sourcing and execution instead of rework. This page is written for designers billing real projects, so it is specific about what the tool controls, what it does not, and where a 3D pipeline is still the right answer.
Why interior designers use it
From photo to concept in minutes
Upload a client's room and generate multiple style directions fast, so the first meeting starts with the client's own room on screen rather than a folder of other people's projects.
Your sketch, rendered
Hand-drawn concept, marker perspective, or a screen grab from your modeling software: sketch to render holds the composition, camera angle, and every wall and window where you drew them, and brings the scene up in real materials and light. No plugin, no model export.
Element-level control, not one prompt
Change the wall, the floor, or a single piece of furniture on its own, and mask a specific area to edit only that region. Concepting is a sequence of deliberate edits rather than one roll of the dice.
The room stays the room
Restyle preserves the existing structure, windows, and proportions, so what you present is recognizably the client's space and not a stock interior that happens to look nice.
You own what you generate
The renders are yours to use in paid client work, whether the design came from your free generations or from credits you purchased, with no attribution required. Review each one before presenting it, the same standard you already apply to any visual you put in front of a client.
A consistent color and material story
Lock a palette and generate rooms that match, so every option you present shares a coherent look rather than a grab bag of ideas.
Nothing to install or learn
It runs in the browser and works from a photo, so there is no model to build and no seat to license before you can put a concept in front of a client this afternoon.
One room, four directions, same afternoon
This is the part that changes the client meeting. Rather than describing a direction and hoping it lands, put four treatments of their actual kitchen on the screen and let them point at one. Every image below started from the single photo on the left.
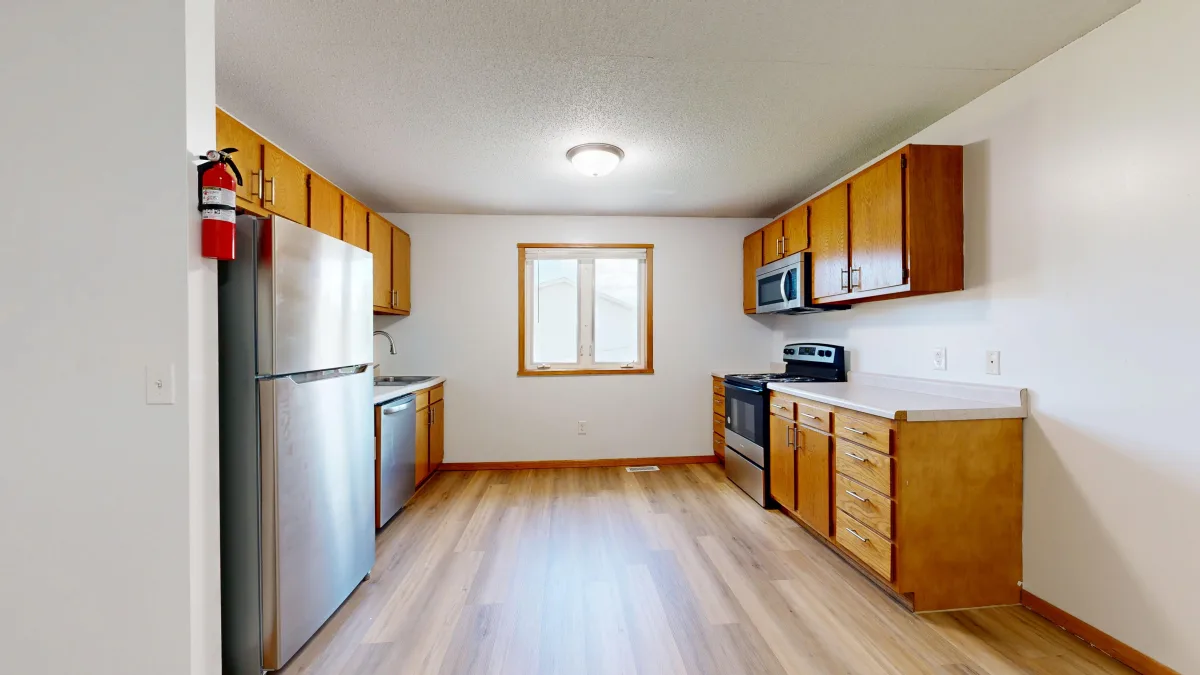 The room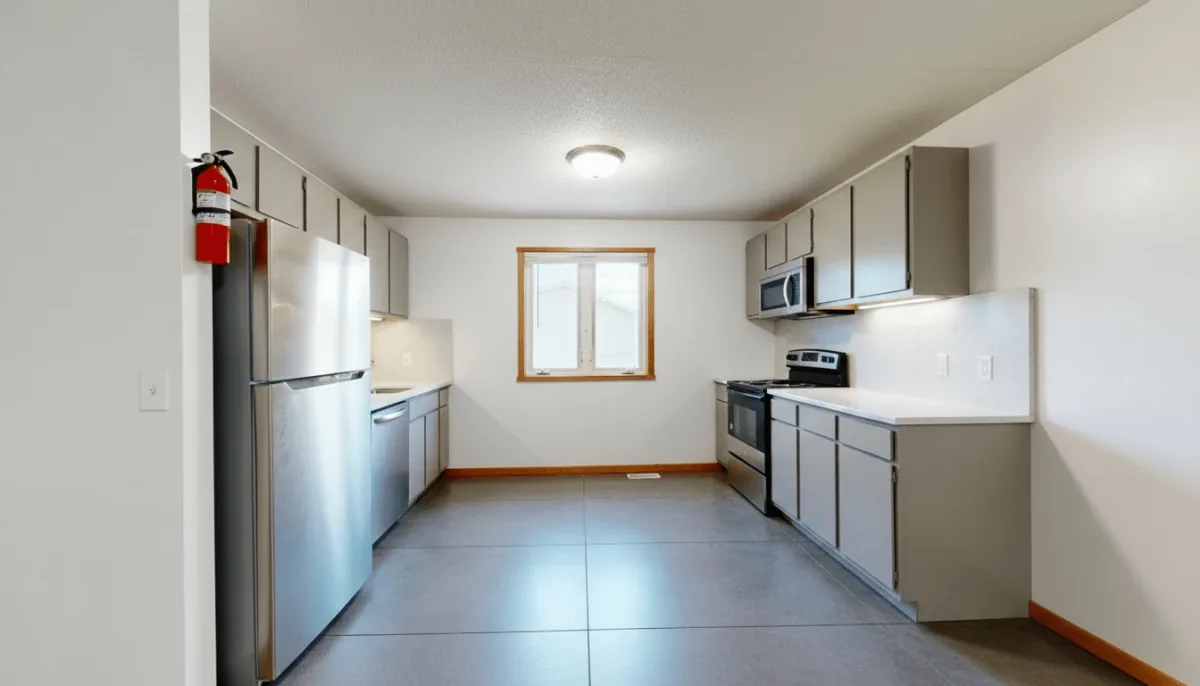
Modern
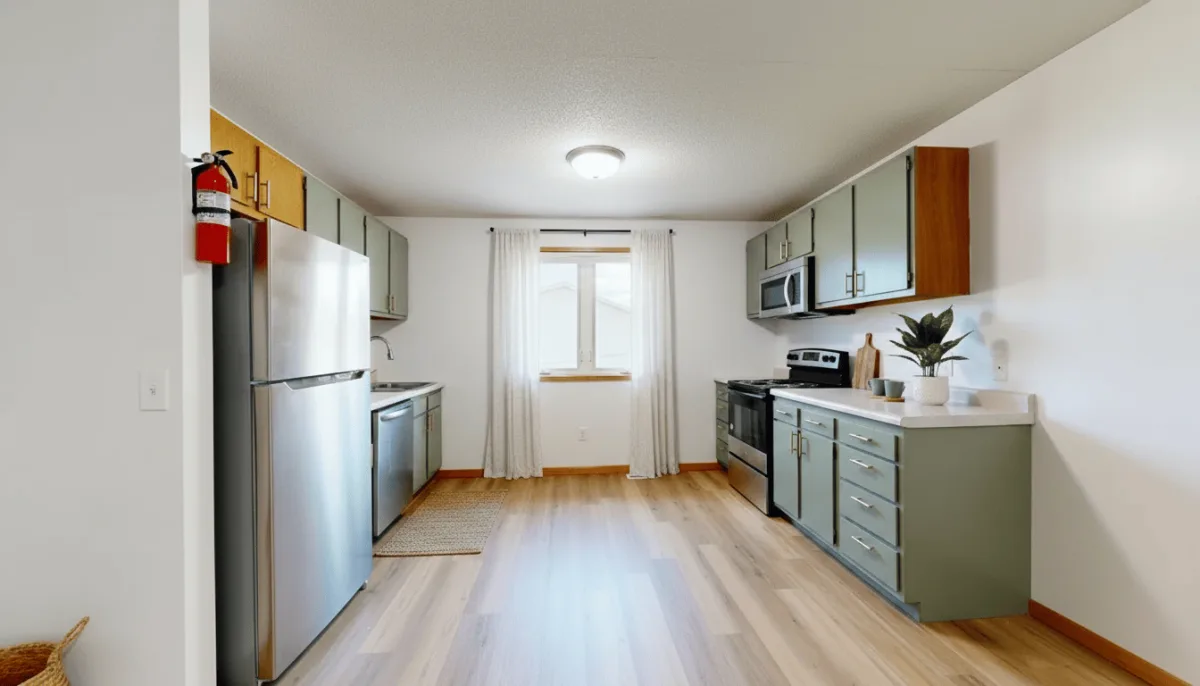
Scandinavian
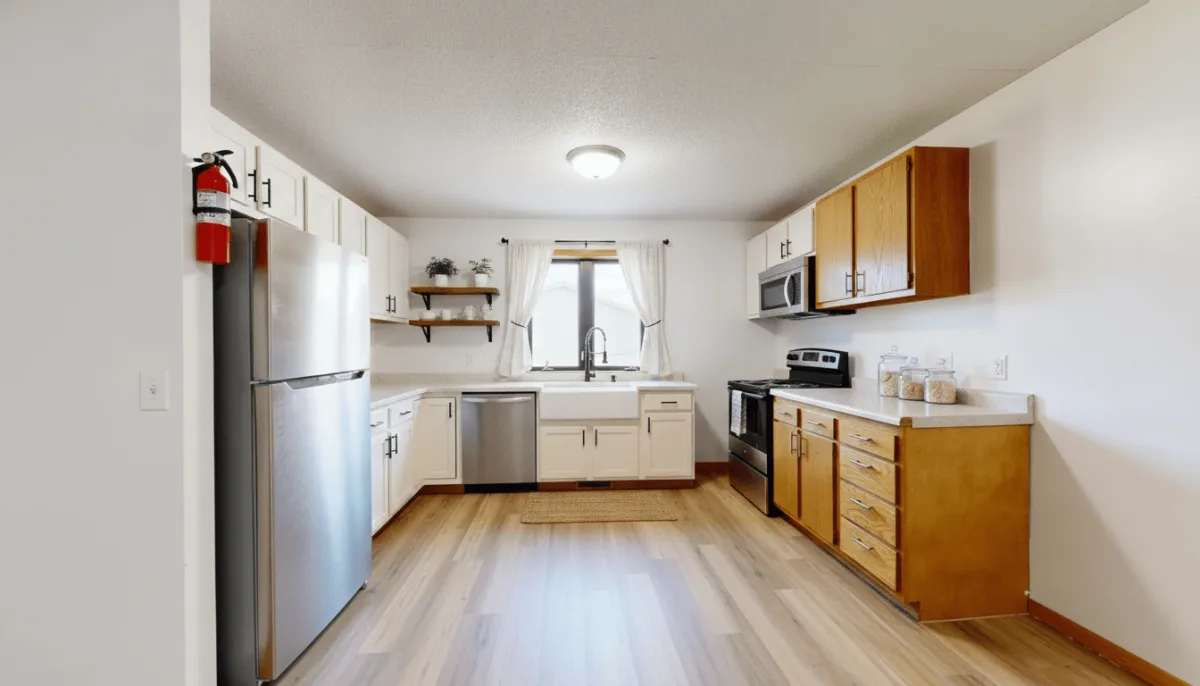
Farmhouse
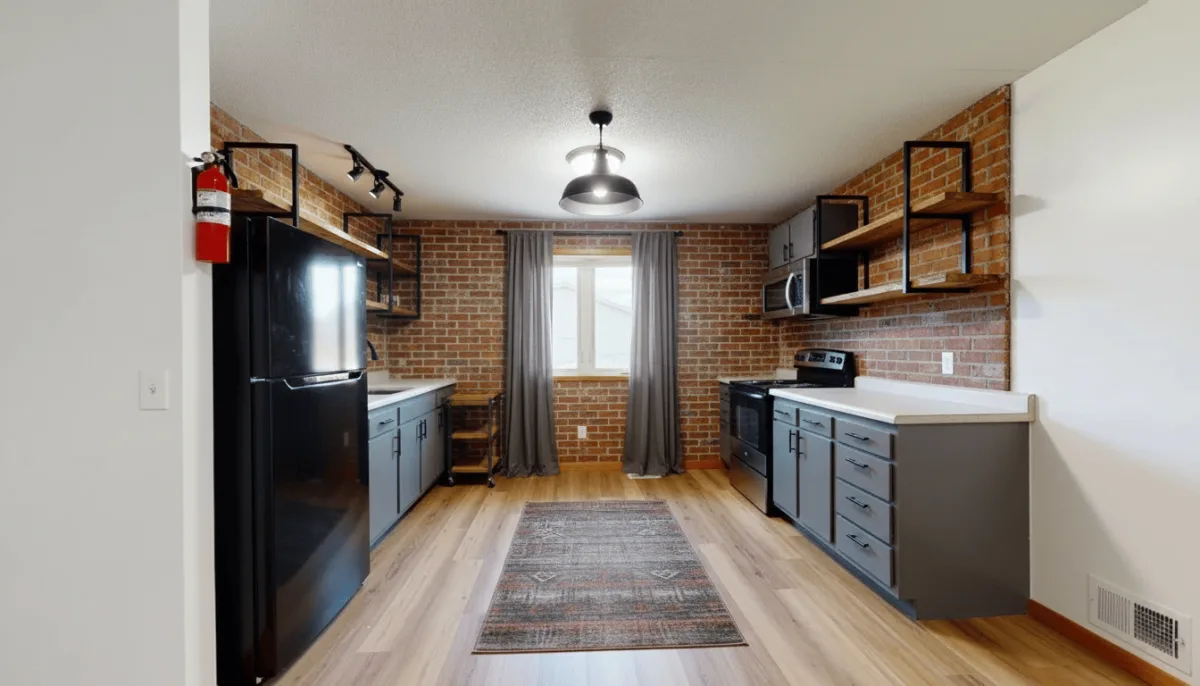
Industrial
How it works
- 1
Upload the client room
Start from a photo of the space you are designing, as it is today.
- 2
Generate directions
Produce several style directions, or restyle while keeping the existing layout, to explore the brief quickly.
- 3
Present and refine
Show the client real renders side by side, lock the direction they respond to, and move into detailed design.
Photo-based AI concepting vs a 3D modeling pipeline
| Photo-based AI | 3D modeling and rendering | |
|---|---|---|
| Time to first concept | Minutes from a room photo | Hours to days, after the model exists |
| What it needs to start | One clear photo of the room | Measurements and a built model |
| Dimensional accuracy | Visually plausible, not measured | Accurate to the model |
| Specification and drawings | Not produced | Produced from the model |
| Exploring directions | Many options cheaply | Each variant costs real time |
| Best stage of the project | Concept and client buy-in | Documentation and final deliverables |
Using AI renders in an interior design mood board
A mood board and a render answer different client objections, which is why they work better together than either does alone. AI Room Styler does not build the board. It produces the one thing a board usually cannot show: the client's own room, committed to a direction.
What the board does that a render cannot
A board carries material, textile, finish, and a price band, side by side, so a client can see what a scheme is made of. A render carries one direction, resolved, in a room they recognise. Present the board for the reasoning and the render for the reaction.
Build it from the client's own room
Four directions from one photo in an afternoon means the board stops being other people's projects. A client who cannot read a plan, and often cannot read a mood board either, can still tell you which of four versions of their own living room they want.
What to place beside the render
The palette it came from, the material and textile samples, the pieces you would actually specify, and a price band. The render sets the direction; the tiles around it are what makes the direction buildable.
Presenting it without over-promising
Say once, out loud, that the render is a direction and not a specification: furniture is representative rather than a catalog item, and dimensions are inferred from the photo. Clients accept that easily at concept stage and resent discovering it at sign-off.
Keeping a set of boards consistent
Lock a palette with the Color Palette Generator and generate every option against it, so three boards for one project share a colour and material story instead of reading as three different projects.
Where this fits in a professional workflow
Most working designers run a stack rather than one tool. This one is built for the concept and buy-in stage, and it is worth being direct about the jobs it should not be doing.
Reach for it when
- You need several credible directions for a first client meeting and the brief is still open.
- You want the client to react to their own room restyled, not to reference photos of someone else's project.
- A client is stuck between two directions and a side-by-side of the actual space would settle it.
- You are testing a palette or a single change, such as the flooring or the wall color, before you commit to specifying it.
- You want to show a renovation idea to a client who cannot read a plan or a mood board.
Use your existing pipeline when
- The deliverable needs to be dimensionally accurate or built from measured drawings.
- You are producing construction documents, elevations, or a specification schedule.
- The client is signing off on a final render where exact fixtures and materials must be the specified ones.
- You need custom joinery or millwork represented precisely rather than suggested.
- Your workflow depends on a CAD or SketchUp plugin, since this runs on images in the browser and does not import models.
Ready to try it on a real room?
Try a restyleNew here? Read what we built and who it is for.